


The three main things you need to be aware of when switching from using auto mode to photographing in manual mode are Aperture, ISO, and Shutter Speed. All of these serve different purposes and work together to ensure your images are exposed correctly. Below I will break down each of them individually to explain what each of them do and how to use them.
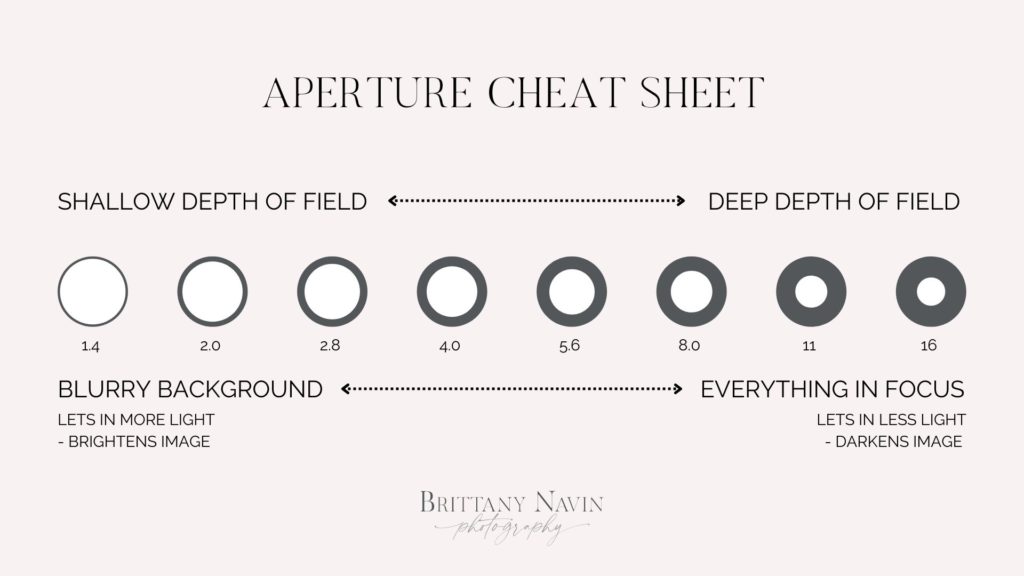
APERTURE (F-STOP)
Your aperture affects the depth of field. What you set it at will determine how blurred or how sharp your background is in your image.
- Lower the number, the more light you let into the camera and the more blur you get in the background, and the sooner the background becomes burry
- Higher the number, the less light you let into the camera and the less blur and more sharp your background will be
I personally set my Aperture first. I like to keep mine low because I love a really blurry background. So, I typically set mine anywhere from f1.8 – f2.2 in most cases. If you are photographing a larger group of people and some people have to stand behind others, you will want to set this number higher in order to ensure the people in the back row aren’t blurry. In these cases I set it around f4 – f5.6, sometimes higher if needed.
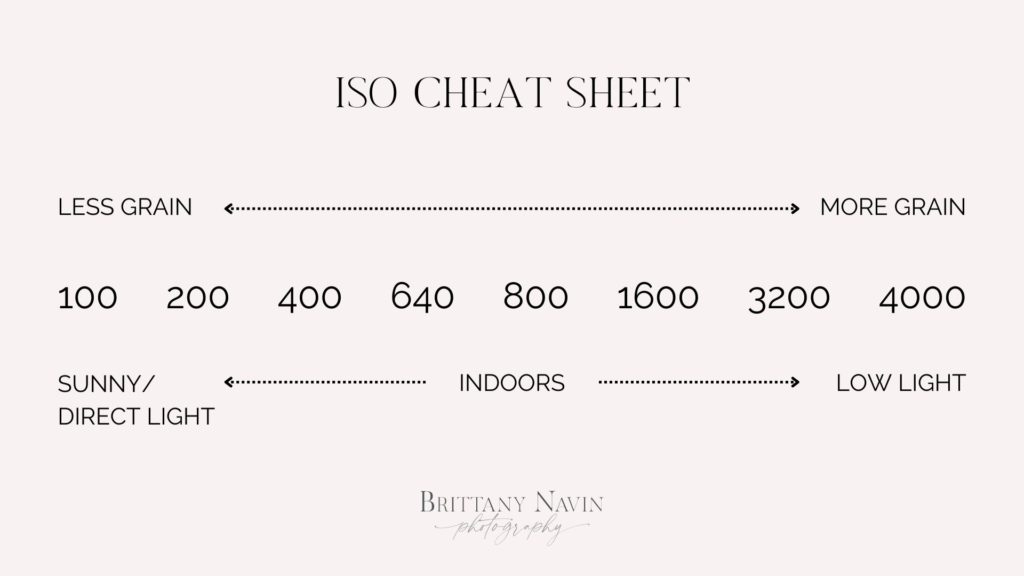
ISO
What you set your ISO to be will determine how sensitive your camera is to light.
- The lower the number, the less light that is let into the camera and less grain happens in your photos
- The higher the number, the more light that is let into the camera and more grain happen in your photos
Once my aperture is set, I set my ISO. This will depend on the environment I am in, but if it’s a bright sunny day, I know I can set it at 100 no problem. If it’s overcast I may move it up somewhere closer to 400. Indoors is different every time based on lighting but I will play around with increasing the number until I feel it’s appropriate without creating too much grain.
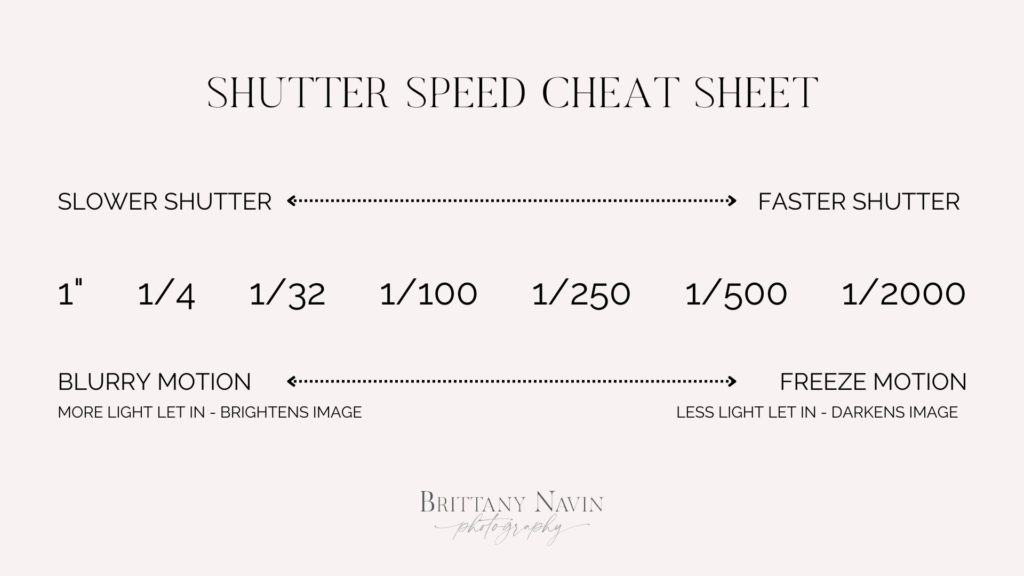
SHUTTER SPEED
This is how fast your shutter is going to open and close when you take a photo.
- The higher the number, the more light that is let into the camera, because the shutter is staying open longer it increases the chance of blur if there is movement
- The lower the number, the less light that is let into the camera, because the shutter is closing more quickly it is able to capture movement more sharply
I always adjust this last! Once I have the other two set, it’s easy to adjust this to whatever I need in order to get a properly exposed image. One thing to watch is making sure you don’t slow the shutter down too much. If it’s too low, you risk taking blurry images. If you notice your shutter speed is too slow, you will need to go back and adjust your ISO to a higher number. That way you can keep a faster shutter speed.
My rule of thumb is to ensure the bottom number is always double the focal length of the lens I have on. So, if I have a 50mm lens on my camera, I don’t want my shutter speed to be any slower than 1/100. If your subjects are moving you definitely want an even faster shutter speed than that.
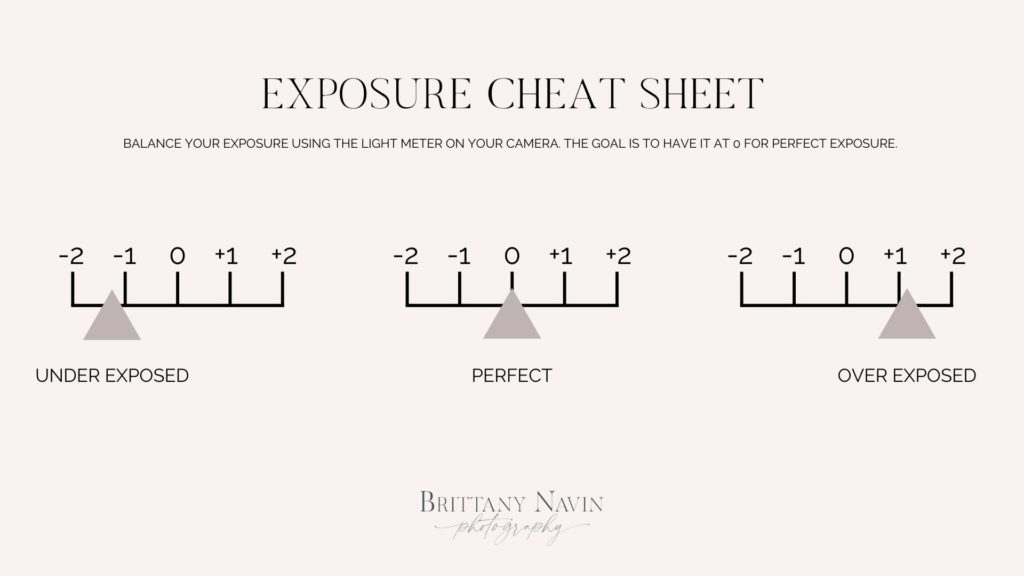
EXPOSURE
You’ll know you have the right exposure in your image by using the light meter shown on your camera. It should look something similar to the basic graph below and you want to aim for 0 to get perfect exposure.
As you adjust your aperture, ISO, and shutter speed you should notice the little block move along the light meter allowing you to see if it’s exposed properly or if more adjustments are needed.
I hope this helps as you make the switch over to photographing in manual mode. If you have any questions at all, feel free to drop it below in the comments or reach out to me HERE. I am always happy to help!


+ COMMENTS
add a comment